There are days (or even weeks!) when you are at home with your children. Fill your days at home with fun, simple and non-toxic crafts and indoor activities. These ideas will engage your children, build skills, and will be enjoyable for both you and your kids. The ideas below use natural materials that are both good for the environment and for your family.
I’ve broken this down into sections by activity type for easier navigation.
This post may contain affiliate links. Please see my full disclosure policy for details.
Quick Navigation
Crafts and Handwork
Yarn Crafts
I use natural fiber yarn like organic cotton or organic wool.
The first project can be having them roll the yarn into a ball. Involving your children in all steps of the process allows them to take pride in what they have accomplished and it’s important for them to learn the value of taking care of their things. The ball doesn’t just magically keep rolling up. If they unroll it, then they should know how to roll it back up.
I recommend having a special place to keep their yarn and finger knitting projects.
Finger Knitting (Single Chain and Four-Finger)
Finger knitting is a great first skill to learn for children ages 4 or 5 and up. All that is needed is some yarn and your fingers!
There are two types of finger knitting and I have linked videos to both below.
My suggestion is that you learn these without your children watching the videos. Then teach them directly. Once they get the hang of finger knitting, they can independently work a long time at this. It is something that they can pick up and put down as needed.
Try different types of yarn to see what your children prefer. Both of my children prefer thinner yarn over chunky yarn but many people say using thicker yarn is easier for children.
Finger Knitting Materials:
Organic yarn: There are many places to find organic yarn. I look for organic GOTS whenever possible. I buy undyed organic wool at Dharma, GOTS organic cotton at Amazon, and there are many online stores that sell organic yarn like O-Wool. Bella Luna also sells organic plant-dyed rainbow yarn.
Finger Knitting
Finger Knitting is really quite simple and you will get the hang of it quickly. With younger children, you might need to sit with them until they pick it up. Once they do it is a project that they can easily do on their own.
I love this video from Bella Luna Toys on Finger Knitting.
There are many projects you can do including ropes, belts, and making flowers. We make a lot of friendship bracelets this way. You can also finger knit a really, really long rope then go back and finger knit (so double finger knit) that rope for a thicker and much shorter rope. My kids enjoy double finger knitting their projects.
Four-Finger Knitting (best for 5+)
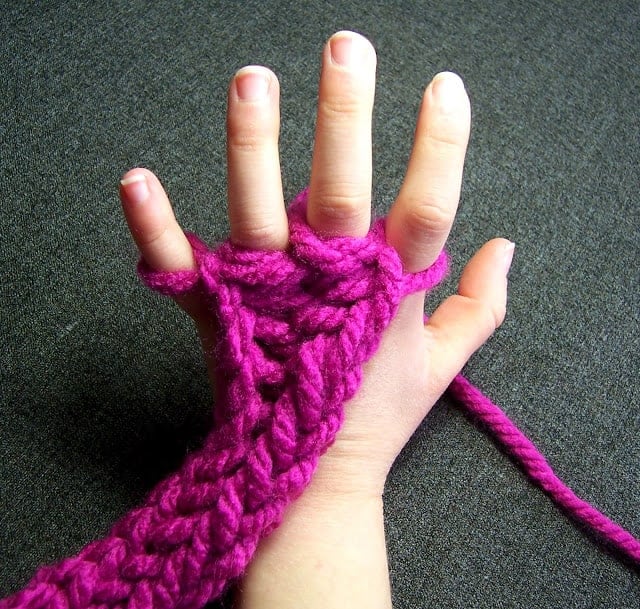
This is a great video on how to Four-Finger Knit. This creates a wider, looser knit.
You can do many things with this type of finger knitting, including simple things like turning it into a play belt or rope. There are also more crafty ideas like turning it into a snake or butterfly. For the butterfly, I would use either cotton pipe cleaners or I would do the single finger knit above (or use a thick string) to tie it together.
Knitting
Teaching a child to knit is more than just knitting. When knitting, children cross the midline and it is great for brain development. Knitting also improves fine motor skills, concentration, hand-eye coordination and is also linked to math skills. Most importantly, children are using their hands to create an object.
There is a strong value in the ability to create with your hands and a deep sense of pride that comes with that.
In Waldorf education, knitting is taught starting in 1st grade with an understanding of both creating and academics. Most children are ready to knit by the time they are 6 (give or take).
How To Teach Your Child To Knit:
My absolute favorite book on knitting for children is called Teaching Through Stories: Jane and Jeremey Learn How to Knit. Stories are told to prep the children on how to knit and then walk them through knitting.
There are simple, achievable projects at the end of the book that guides you through how to make each item. We have been working our way through this book and love it very much.
As children begin to learn to knit, I cast on and knit the first few rows for them. I also cast off for them. Sometimes if they are adding or dropping rows, I will knit a row or 2 in the middle of their project to help get them back on track. Mostly though I try and let them fully knit, even with mistakes. I don’t point out mistakes or try and fix them (unless they are not consistently knitting properly).
The more they knit, the more they will learn. Eventually, they will be ready to cast on and off themselves. Mastering the basics of knitting without learning how to cast on and off is a valuable first skill.
What If You Don’t Know How To Knit?
If you don’t know how to knit, I would recommend sitting down and watching a few basic YouTube videos on beginning knitting. It’s difficult to teach your children to knit if you have not done it yourself.
Knitting Materials:
Organic yarn: There are many places to find organic yarn. I look for organic GOTS whenever possible. I buy undyed organic wool at Dharma, GOTS organic cotton at Amazon, and there are many online stores that sell organic yarn like O-Wool.
Knitting needles: For children, the knitting needles I like are from Palumba. They are a good size for them and easy to work with.
For younger children, a Knitting Tower can be fun and they can sit down and knit with you or their older siblings. Finger knitting is a good option for younger children while the older children knit.
Branch weaving
You will be creating a beautiful weave of nature items on a stick to display in your home.
- Find a Y shaped stick of any size
- Take your yarn and tie a knot at the intersection of the Y
- Wrap your yarn around the stick, spacing it out along the way up to the open end.
- To keep the yarn from sliding, you can wrap a full circle around each outer edge of the stick (we did not do that in the picture below but it would have been helpful).
- Find any longer nature items you want to weave into your stick. Once you have collected your items weave them under and over each row of yarn.
Below is a picture of my son’s first branch weaving.
God’s Eyes
Find two similar-sized sticks or you can use popsicle sticks. I prefer sticks but either will work. This is a great tutorial on making God’s Eyes.
Sewing with Kids
Children love to sew by hand. We make little sewing projects often. Currently, my youngest is sewing a felt wallet and my oldest is sewing a felt bag.
Even the youngest of children love to sew, I would say from 2.5 and up. For young children, I always use blunt-tipped needles (ie not sharp) and punch holes through the felt (or even fabric). This provides a guide for them as well. You could also use muslin or another type of loosely woven fabric that a blunt needled could go easily through.
With the younger ages (under 4), it’s about the process and less about the project. They would be happy to just sew around a square cloth.
As my children get older we sew with regular needles with guidance until they are old enough to use them safely.
Sewing Materials:
Stainless Steel Blunt Tip Needles (not sharp)
Thread: Scanfil Organic Cotton (GOTS Certified) thread can be purchased on Amazon or Organic Cotton Plus
Organic Twine: I use this on some projects or for when I want a thicker thread for younger children. I buy from Rawganique.
Organic Felt: Most of the felt you get in the stores is synthetic or synthetic blend. I buy our organic felt at Organic Cotton Plus or at A Child’s Dream (plant dyed). I also occasionally buy Oeko-Tex non-organic felt from Crafty Wool Felt.
Organic Fabric: I look for organic, GOTS certified fabric. I love Birch and through Fabricworm. Cloud9 is another good option as well. Other places that I buy from are Organic Cotton Plus and Sew Organic Fabric on Etsy.
Organic Wool for stuffing can be found on Organic Cotton Plus.
Hand Sewing
Below are multiple hand sewing project ideas.
Sewing with Felt
Felt is firm enough that it provides something substantial in your hands. It’s also durable for play.
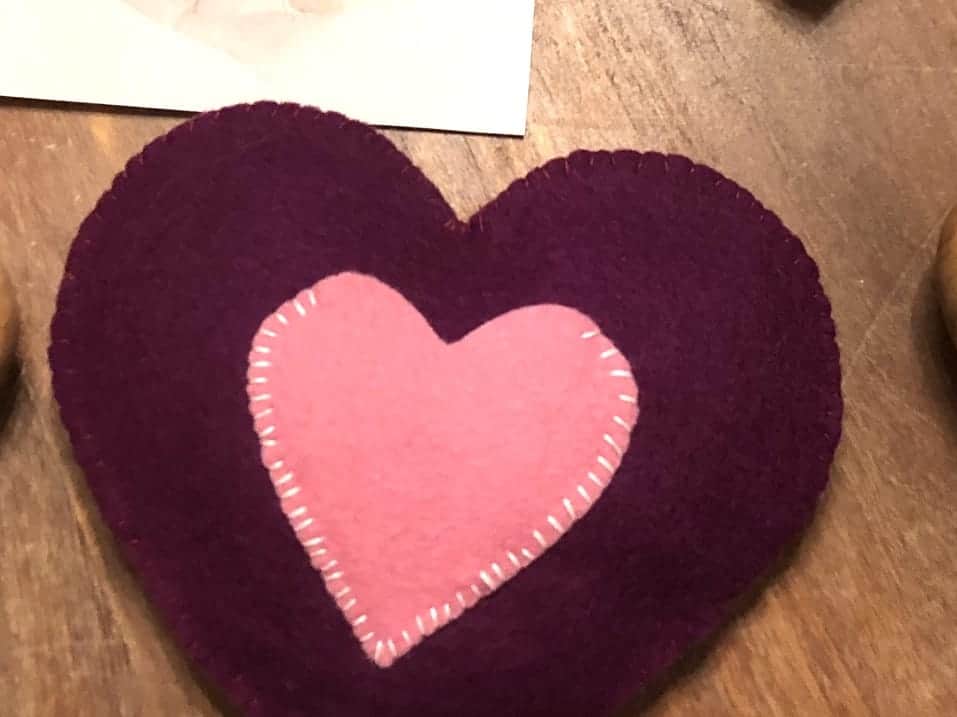
Below is a picture of a heart that is sewed and stuffed with wool. On the outside is a heart pocket. Tip: you want to sew the pocket first, then sew the larger two pieces of felt.
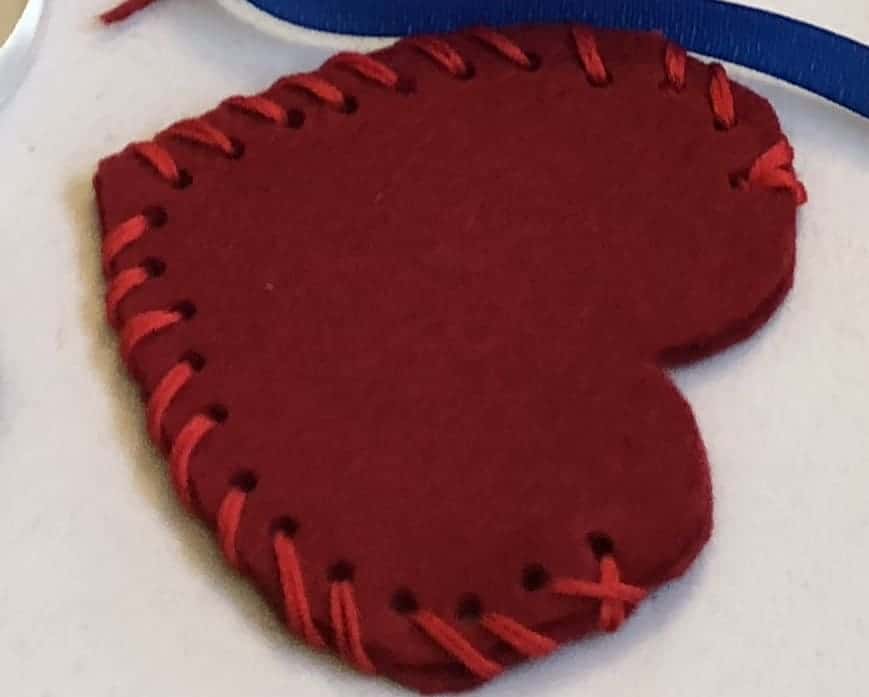
Below is a heart pouch done by a younger child.
The holes were pre-punched through both pieces of felt at the same time. Tie a knot on the first hole so it doesn’t pull through when the child starts sewing.
There are endless options for sewing with felt, these are just two examples. You can also use fabric for these same purposes
Peg Dolls with Felt Clothes
The felt gnome tutorial from Wee Folk Arts shows how simply you can make clothing for a peg doll.
In the tutorial above they use glue to secure the felt. I’ve found that you can tightly sew the clothing onto the peg doll. You might find it helpful to use a little glue to keep the hat on.
This is a project for older children (6/7 and up) and a great way to learn different types of stitches.
You can buy solid wood, made in the USA, peg dolls on Amazon.
Sewing with Fabric
You can do many of the same projects with felt or fabric. Doing simple animals or animal puppets is a fun and rewarding project for children.
Sewing a Stuffed Bunny:
Both of my children hand sewed bunnies from a patterned bunny we traced on paper.
- Hand draw your bunny
- Cut out the paper pattern
- Pin it to two pieces of fabric
- Cut out the fabric
- Sew around the edges
- Leave a little hole and stuff with wool
- Sew up the final hole
Sewing a Bear Puppet:
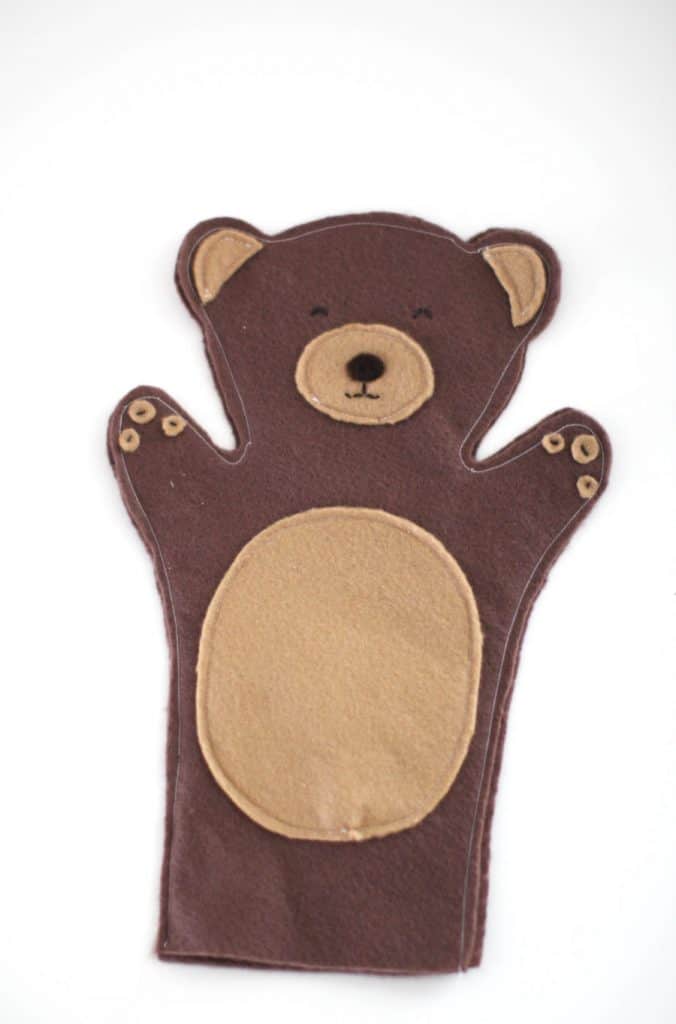
This bear puppet is adorable. It’s free and printable. If you didn’t want to make a puppet you could stuff it with wool and stitch up the bottom. Birch fabric has organic cotton fleece that would be so cute with this pattern.
With this pattern, your child would hand sew the outside of the puppet instead of being machine sewn like it is below.
Sewing with Construction Paper
Sewing with construction paper offers a way to practice sewing skills without needing fabric. It’s a great way for kids to do a complete sewing project themselves – cutting, coloring, and sewing.
- Use construction paper (any thick paper will work)
- Cut the two pieces of paper into any shape
- Color with crayons (optional)
- Punch holes around the edge
- Sew with yarn or twine
Sewing a Paper Heart Pouch:
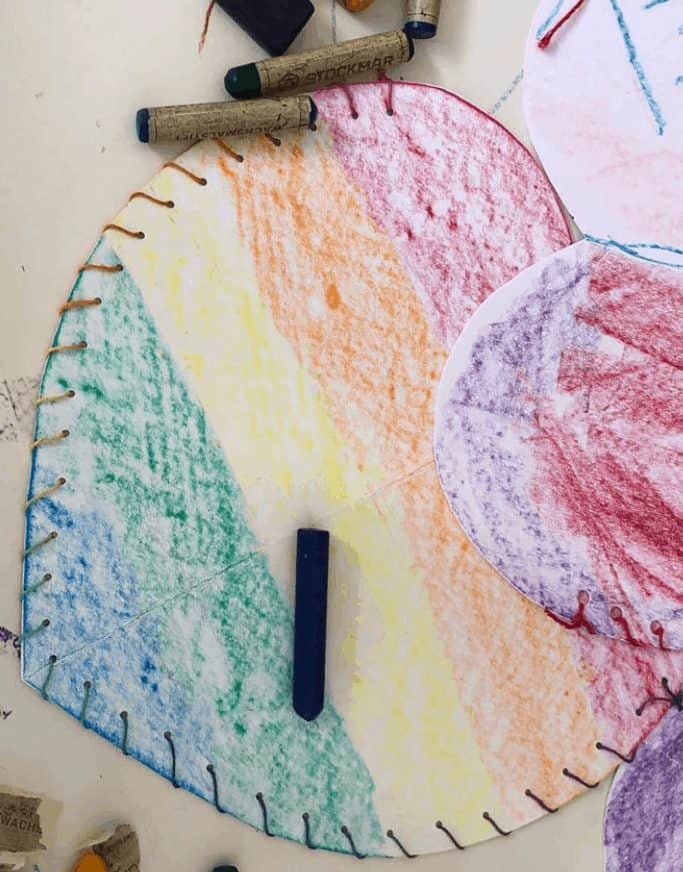
The picture below was done at a community event.
These were Valentine’s Day envelopes for their class but you can do this any time of year. You also don’t need to make it a pouch.
I had cut the paper out into large hearts for the children. Each child got two pieces of paper and they colored them using crayons. When they were finished coloring, we punched holes all the way around except for the top since this was an envelope. Lastly, the children sewed their two hearts together to create a pouch using organic rainbow hemp twine from Rawganique.
Younger children used blunt-tipped needles. If you don’t have needles, you can add tape to one end of the twine and the tape becomes like a needle.
For younger children, sewing is the fun part, not necessarily the outcome.
Machine Sewing
Teaching older children how to sew on a sewing machine is a great life skill. I was taught as a child but didn’t sew much until I had children. I started my making their Halloween costumes (9 years running!) and then ventured into a few other things. Knowing how to sew has been very useful.
If you don’t have a sewing machine, look to your local Buy Nothing Groups to see if anyone is ready to part with theirs.
How to Sew Cloth Napkins:
One great project is sewing cloth napkins. I also have placemats for my children. They love having these.
Making cloth napkins would be a fantastic gift from your children to others.
Sewing napkins is very simple:
- You will need two pieces of fabric
- Iron the fabric
- Cut to the size you would like (the child-size napkins below are about 10 inches)
- Lay the two pieces of fabric with the wrong sides facing out
- Sew all around the sides leaving a few inch gap
- Flip the fabric it right side in through the hole
- Sewing a 1/4 inches border around the outside of the napkin (that will secure up the hole)
I use organic, GOTS certified fabric. In the materials section above I list where I buy my organic fabric. You can read my post on If Organic Cotton is Worth It.
If you are going to be wiping your hands on a napkin while eating I would want to make sure it’s as low toxin as possible. Shown here is Birch Fabrics.

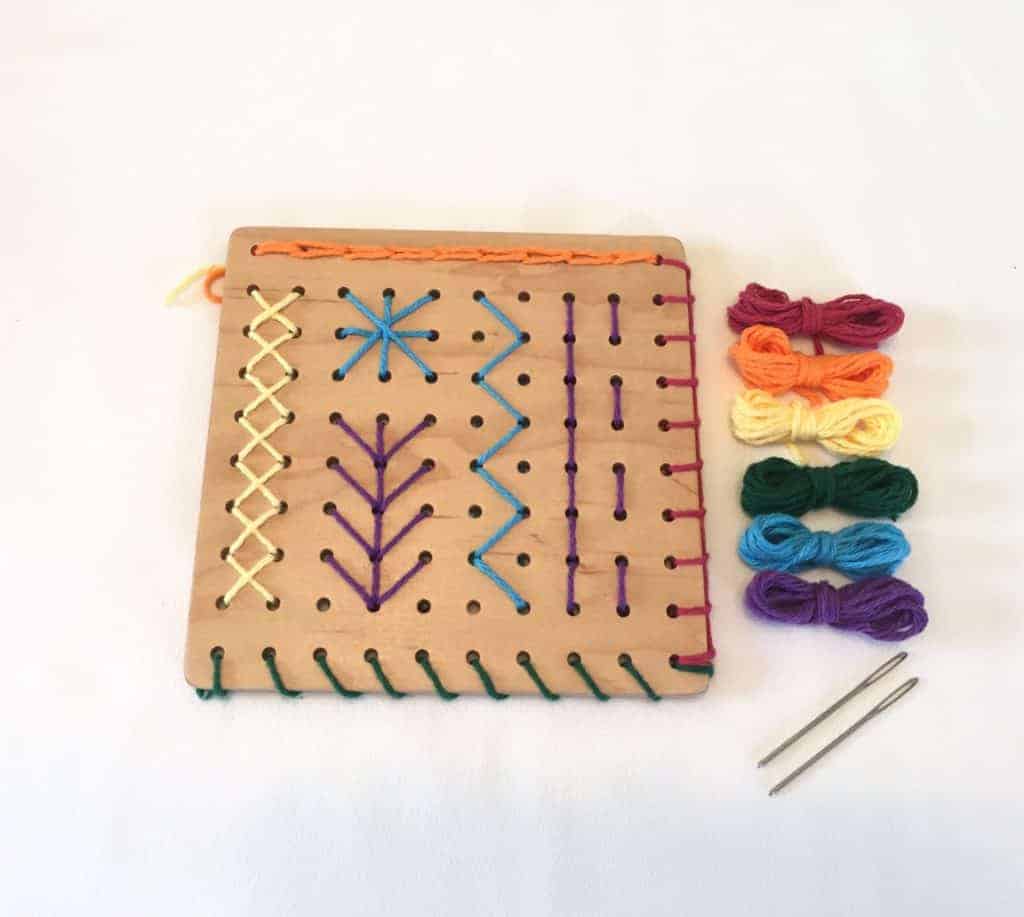
Sewing boards:
From Jennifer on Etsy makes these beautiful sewing boards. This would be a great way to practice different types of stitches.
Painting with Children
Painting is a favorite activity in our house. We like to do many types of painting, however, Wet on Wet painting (see below) is one we do the most often.
Painting Materials:
Paints: I use Stockmar watercolor paints and Stockmar paints (for wet on wet painting).
Paper: I use Strathmore watercolor paper in either 8×10 or 11×14.
Brushes: We love the Palumba brushes
Paint Jars: We use the Palumba Jar Set Holder or Mason Jelly Jars.
Painting boards: I like having painting boards for each person. It provides a space to paint where I don’t worry about getting messy. We have painting boards from both From Jennifer and Palumba and we like them both equally.
The Palumba boards are bigger and you can set your paint jars on the boards. One note about the Palumba boards – I requested unfinished. At the time they were using a marine finish which I was not comfortable with. If you want the finish contact them about what they are using.
The From Jennifer boards have a ridge around the outside which is nice for when we are drawing with crayons (From Jennifer literally made these boards out of a request from me for a solid wood painting board – how cool is that!).
Wet on Wet painting
Wet on Wet is a watercolor painting on wet paper. It adds a beauty to not only the final painting but the way the paint moves on the paper.
How to wet on wet paint:
To Wet on Wet, soak quality painting paper (like the Strathmore mentioned above) for just a few minutes. I use a pyrex and if my paper doesn’t fully fit in I just adjust it a few minutes in. I soak my paper first then get everything else set up. By the time I’m done getting my boards and paint out the paper is ready.
You’ll take a sponge that has been wrung out and wipe the paper across from side to side starting at the top. This takes the excess water off the paper and makes sure there are no bubbles. If you can’t get a bubble out, lift up the paper and lay it back down. Then use your sponge again on your paper.
Then you paint! I use only red, yellow and blue (the Stockmar listed above). It’s fun to just play with each color then slowly mix colors. When you mix colors make sure your paintbrush is clean before dipping into your next color so you don’t contaminate your colors.
Once you start mixing on the page usually you don’t need to go back for more color. It’s a great lesson in color theory for kids!
The paints will last a long time in jars with lids.
What to do with your painting once you are done:
Once you have your painting done you can do many things with it besides just keeping it in a drawer.
If you are looking for more ideas than just hanging on your walls, we often cut them in half and turn them into cards for people. I only do this for when we are free painting or having fun. I never cut up the lessons or special paintings we do.
With cards we then use crayons on write on the backside and make drawings. You can also glue nature items to the front.
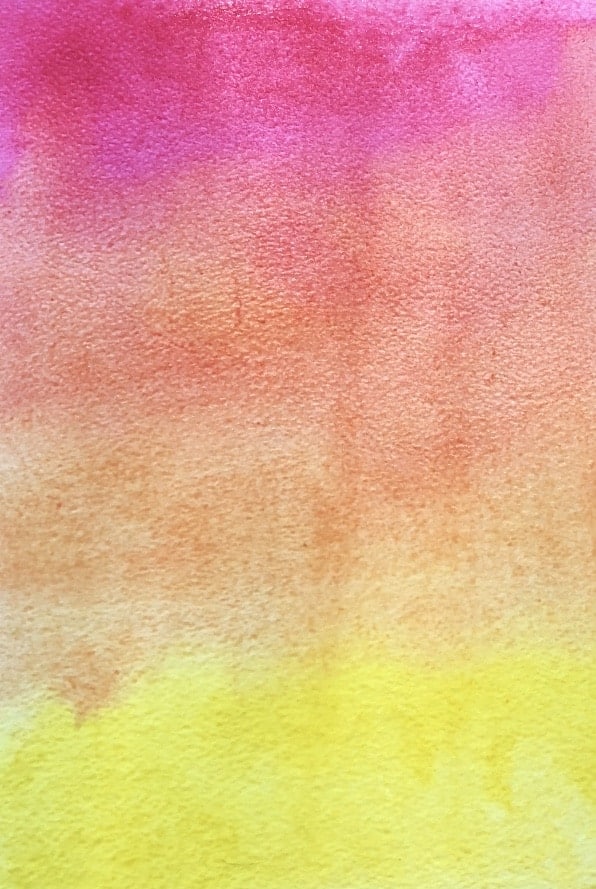
Here is a picture of one of my wet on wet paintings using red and yellow.
Waldorf-ish (online art program)
Waldorf-ish is an online-based Waldorf painting and art program that teaches a variety of classes. Most classes are taught by trained Waldorf teachers.
We do the Grade One Painting class which has over 33 lessons. I watch the videos (which are 3-5 minutes per lesson) then I teach my son the next day. I LOVE this class and my son loves what we do together. It teaches not only wet on wet painting but also color theory.
Painting Peg Dolls
Peg dolls can be used for so many things during play!
I have simply painted peg dolls using my Stockmar watercolor paints. Some of the paint is transferring to my hands so I plan to use a beeswax finish to see if this helps. Otherwise, using non-watercolor paint would work as well.
You can buy solid wood, made in the USA, peg dolls on Amazon.
Having children paint peg dolls is a good fine motor activity. Paint the bodies then let them dry then go back to the heads.
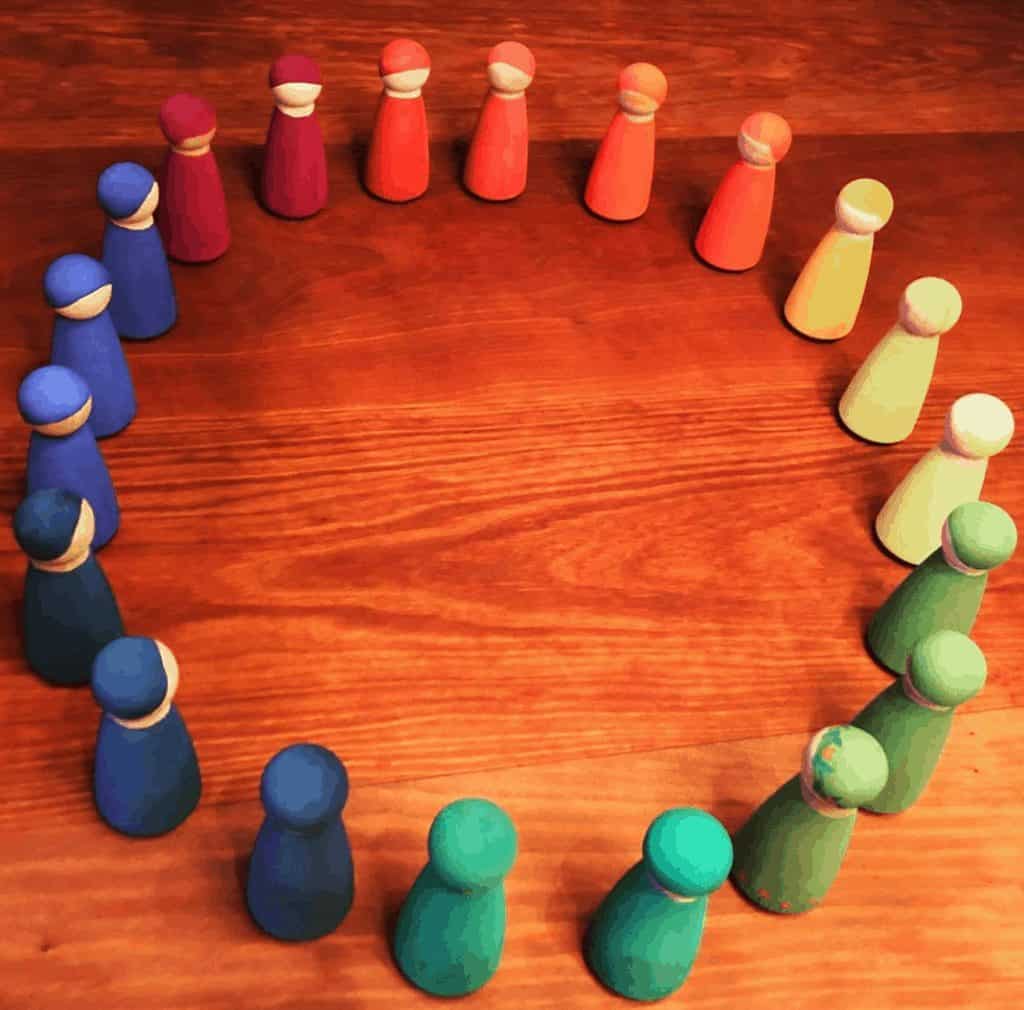
These peg dolls were painted with a group of friends for our children.
Painting Rocks or Shells
Painting rocks is always a fun activity. You can make kindness rocks and leave them on your walks for others to see or adorn the outside of your house with them. There are so many possibilities!
The Stockmar paints I listed above do not set on rocks. I don’t have a specific recommendation for non-toxic paint for rocks.
If used on shells it will wash off if left outside and it rains (speaking from experience!)
Wool Crafts
There is nothing better than the feeling of natural fibers in your hands. Wool has a warmth and softness to it and I love using it in our home.
Wet Felting
My kids love wet felting. It can get a bit messy with younger children so keep towels around. It’s best to start with something simple like balls.
Here is a good tutorial on wet felting.
Wet Felting Materials:
Wool Roving: I buy organic plant dyed wool roving and organic undyed roving.
Soap: I use Dr. Bronners Baby Mild
Bin for soapy water
Towels to clean up messes
Needle Felting with Cookie Cutters
For older children, at least 7+, who you feel comfortable using a very sharp barbed needle to repeatedly poke wool. I would highly recommend direct adult supervision with this activity. Needle felting is a faster, and neater process, than wet felting (although more dangerous).
One tip for kids is to use a cookie-cutter so that the needle doesn’t accidentally poke into their finger. There are also finger shields available.
Needle Felting Materials:
Wool Roving: I buy organic plant dyed wool roving and organic undyed roving.
Felting Needle: I personally like the felting needle with a wood top but you can also use straight felting needles (without the tops).
Finger protection: I own these silicone finger guards
Sponge or Wool pad for under your work
Cookie Cutter (optional): Stainless steel cookie cutters
How to Needle Felt:
This needle felting tutorial shows how to easily needle felt a heart using a cookie cutter.
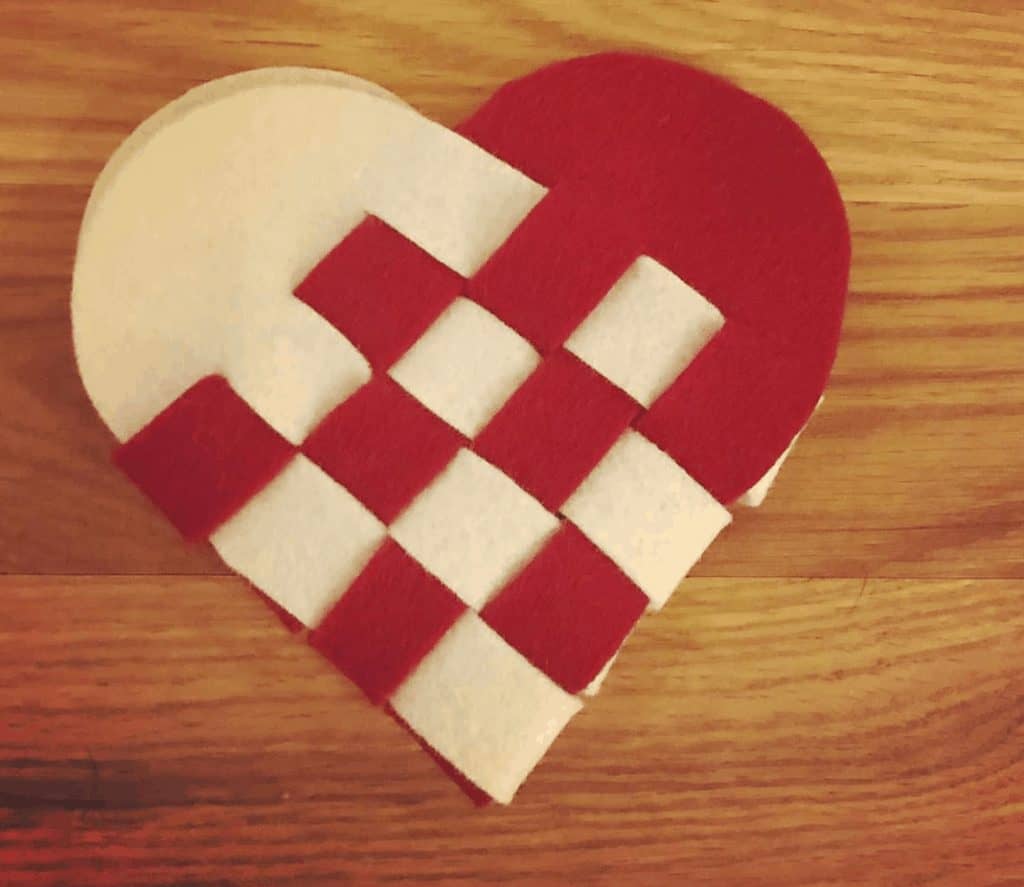
Woven Heart Basket
This technique is a fun weaving project for kids and makes a cute little basket. You can find out how to easily make this woven heart basket with this Bella Luna video.
Beeswax Crafts
Stockmar Modeling Wax
Stockmar modeling wax is a fun way to be creative. It can also be a challenging project for kids. My kids love it!
How to use Stockmar Modeling Wax:
With this modeling wax, you have to get it pretty warm before it is soft enough to move easily with your hands. You can warm it by holding it in your hands but it’s easier to warm it if it is under your arm or on your belly!
Once it is warm you can mold into anything you want. We have made monkeys, birds, a bird’s nest, balls, and hearts to name a few. It will harden up once you are done.
Sometimes it’s fun to tell a story then model something from that story. Usually, we pick an animal main character.
Full disclosure: this is not 100% beeswax and there is not a modeling wax on the market that is (I’ve looked many times). There is paraffin (ie mineral oil) in this in addition to the beeswax. Stockmar safety tests for toxins and heavy metals.
Make beeswax candles
Making candles is not only fun but also useful. 100% beeswax candles are great for your home but also wonderful gifts. Typical scented candles lead to poor indoor air quality. Beeswax candles actually improve air quality!
Beeswax Candles Materials:
Beeswax: if you can find local or organic local beekeeper that sells wax that would be my first choice! Big Dipper sells their beeswax (which are the candles I buy), there are also several organic beeswax options on Amazon. Do your research on Amazon and make sure it isn’t sourced in China.
Pan: You will need a dedicated beeswax pan or you can buy a stainless double broiler to dedicate to your beeswax. This is a pan you will want to not cook in again (as the wax will never fully come out). I like the double boiler because it has an easy pour spout. Tip: you can leave the wax you don’t use in the pan for the next time!
Organic or natural wick: Some wicks still contain lead (yikes!) but there are some great 100% organic cotton or hemp wicks available.
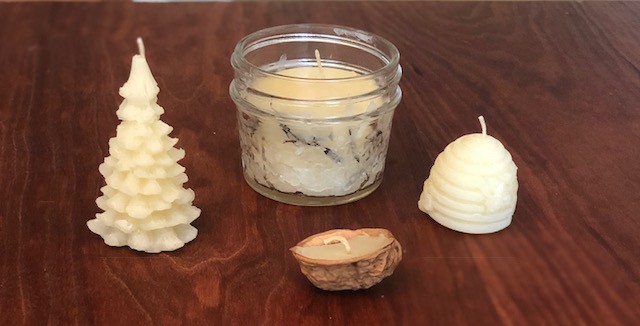
Containers: Silicone candle molds like trees or bees, Mason Jelly Jars or walnut shells (these will float).
How to Make Beeswax Candles:
Once you have your supplies, it’s as easy as heating the wax, pouring it into your container and inserting your wick.
Silicone molds:
For the silicone molds, they will set in the mold then you take out once cooled and have your candle shaped into something fun.
Mason jars candles:
For mason jars, you can pour the wax straight into the mason jar and have a simple candle.
You can also add fresh organic herbs. I’ve done this with rosemary and added a tiny bit of wax to the inside outer wall of the mason jar. Lightly press the rosemary so you can see it once it is set. Then pour the beeswax in and add any more rosemary you would like. Set your wick and let it sit until it is solid.
To keep your wick upright, I put a popsicle stick laying across the top and bend the wick over it to hold it in place (it’s never touching the wax).
Walnut candles:
In the fall you can find whole walnuts. These are so sweet to turn into candles and they will float in water.
Break apart the shells, scoop out (and eat!) the walnuts. Then gently pour the wax in walnut shell boat. Insert a wick in the center.
You will need to have something to lean it against while the wax dries so the walnut shell doesn’t tip over and spill out the wax.
If your wick isn’t standing upright, use a toothpick or popsicle stick laying across the top (it’s never touching the wax) to help hold the wick in place.
Dip leaves in beeswax
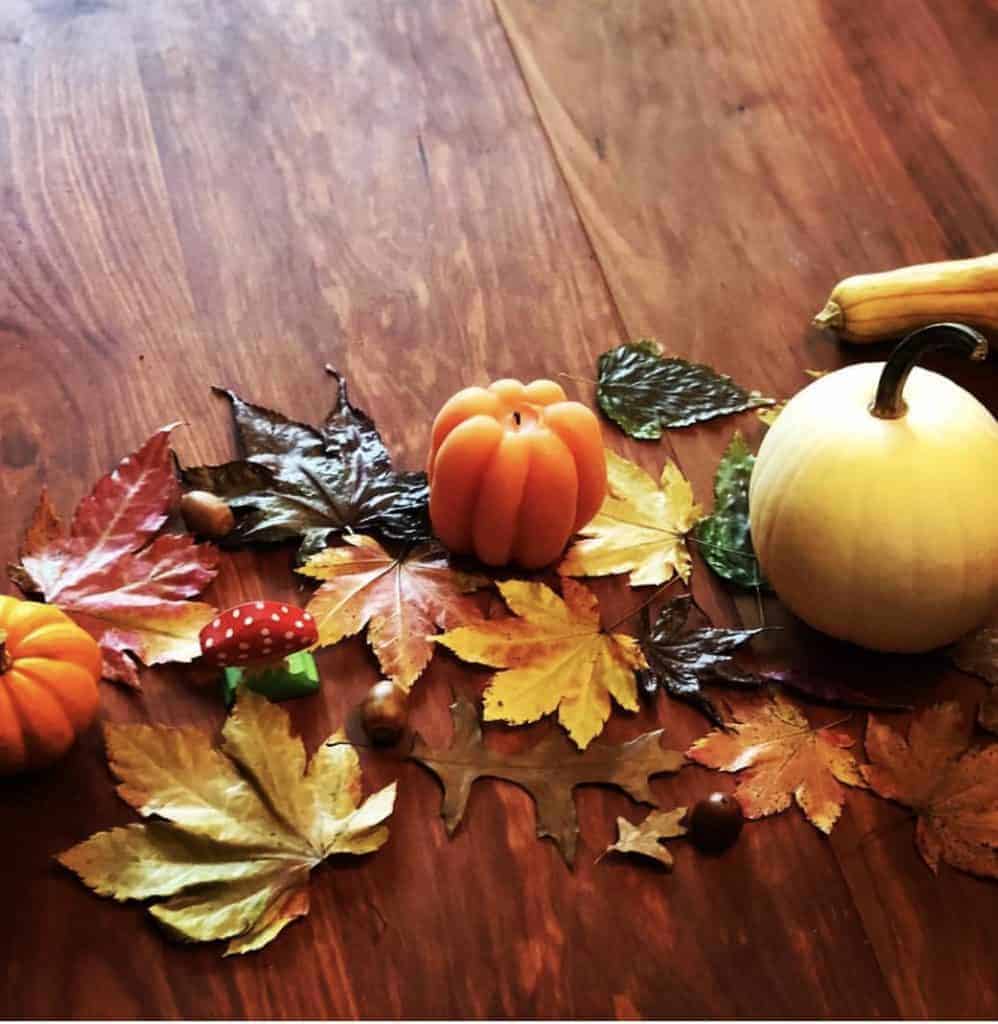
Another great beeswax use is leaf dipping. In the fall gather some colorful leaves. If they are wet, make sure to dry them out overnight.
Dip them gently into the wax, fully covering them. Let any excess drip off then let the wax dry. It will preserve the leaves for years.
Paper Crafts
Paper Tree – Kindness, Grateful or Weather Tree
Use easel paper and roll out a tall tree trunk. Roll out more for different branches. Draw an outline then cut the trunk and tree branches. Color in all parts then tape to the wall to create your tree.
You can then cut out leaves and use them in several ways.
A Weather Tree:
You can use different color leaves to represent different types of weather (snow, sun, rain, clouds). Each day you can check the weather and add a leaf to your tree. At the end of the year, you can see all the types of weather you have had.
A Kindness Tree:
When your children do something kind you can write it down on a leaf and add it to the tree. If the leaves seem like too much you can also get heart post-it notes.
A Grateful Tree:
Write things you are grateful for daily and post it on the tree.
Our tree is a combo of a weather tree and a kindness tree so you don’t have to stick to one thing!
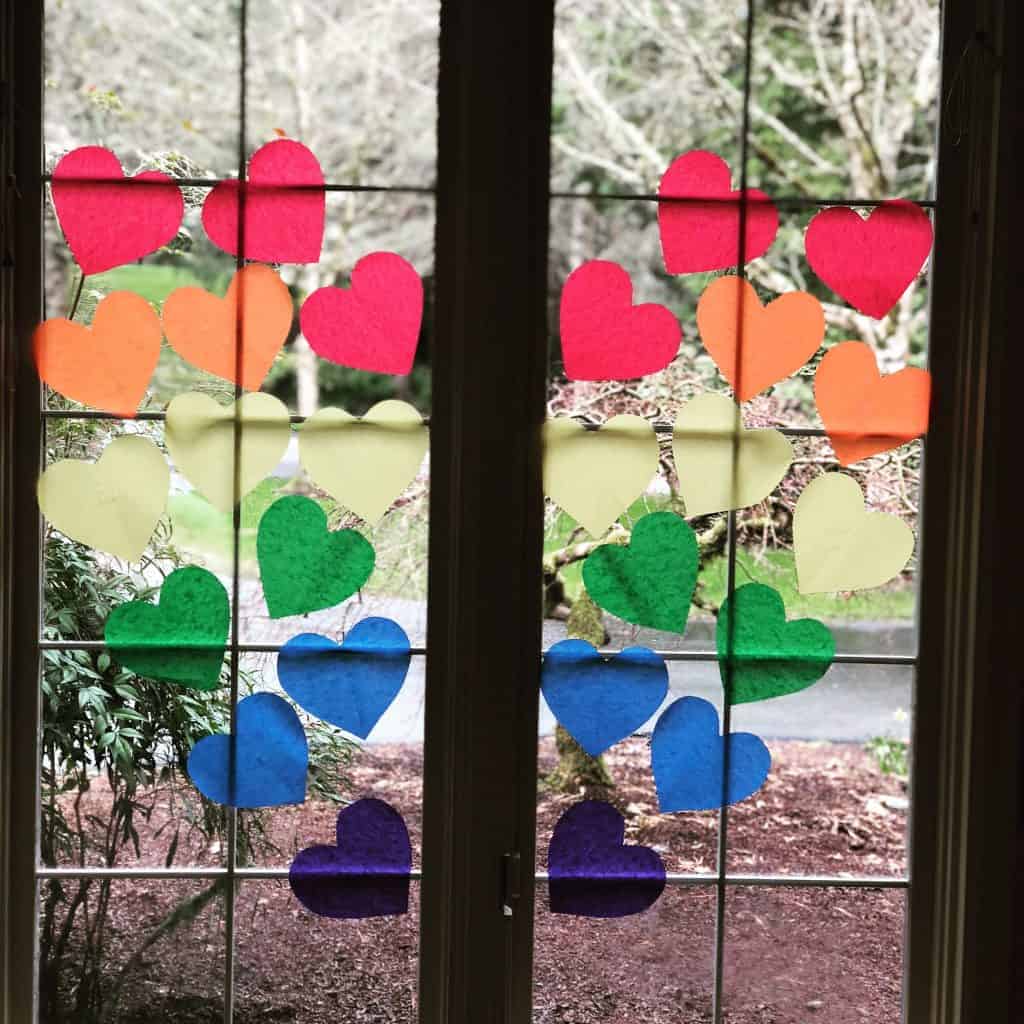
Paper Window Decorations
I use kite paper for decorations on our windows. Colored paper or tissue paper would work as well.
You can get creative! I recently made a big heart out of a bunch of little hearts for our window.
I cut a heart out of white paper, then used that as a template for cutting all my other hearts. I stacked multiple layers of kite paper together so I was able to cut quickly.
I simply taped each heart to the window.
My children participated some but I ended up doing most of the work. They love the end result though!
Paper Mache Lanterns
Making paper mache lanterns is not only a fun activity but it can be a way to bring light to your home.
Light in the terms of hope, for new beginnings, in times of darkness (both going into winter or things going on in the world), and in literal terms as spring approaches and brings more light to the earth.
I found this great tutorial to make flower paper mache lanterns and they are so beautiful!
Paper Baskets
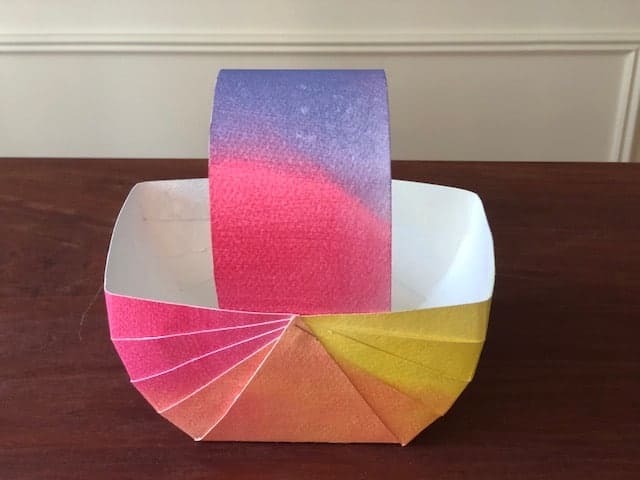
We recently made paper baskets and everyone really enjoyed it. We wet on wet watercolored paper first (see painting section above) then did our baskets the next day.
My kids not only enjoyed making them but they are enjoying having them. You get to paint, cut and assemble all in one craft!
These also would make sweet Easter egg collection baskets too.
Shadow puppets
Use black cardstock to cut out shapes and glue popsicle sticks (made in USA wooden popsicle sticks) onto the back for children to hold. Get a thin sheet, or silk, and a book light to shine from the back towards your sheet.
Tell a story and have children reenact the story with their shadow puppets.
Binoculars from Toilet Paper Rolls
Kids love making binoculars out of toilet paper rolls.
Toilet Paper Roll Binocular Materials needed:
- 2 toilet paper rolls
- Tape to adhere them together
- String if you want it to hang around their neck (finger knitting is a great option – see instructions above).
- Crayons for coloring (optional)
It’s as simple as that!
Construction Paper Crowns
- Cut out a crown of any shape
- Fit it to their head
- Color with crayons (optional)
- Secure with tape
Fun play always transpires after this!
Paper Chains
Make paper chains to decorate the house for seasons. We make paper chains for birthdays and to celebrate holidays.
We also use paper chains to count down exciting events. Each day they rip off a paper chain as the event gets closer.
This is a good activity for little hands. I always tear of multiple pieces of tape and have it on the edge of the table for them.
Window Transparencies
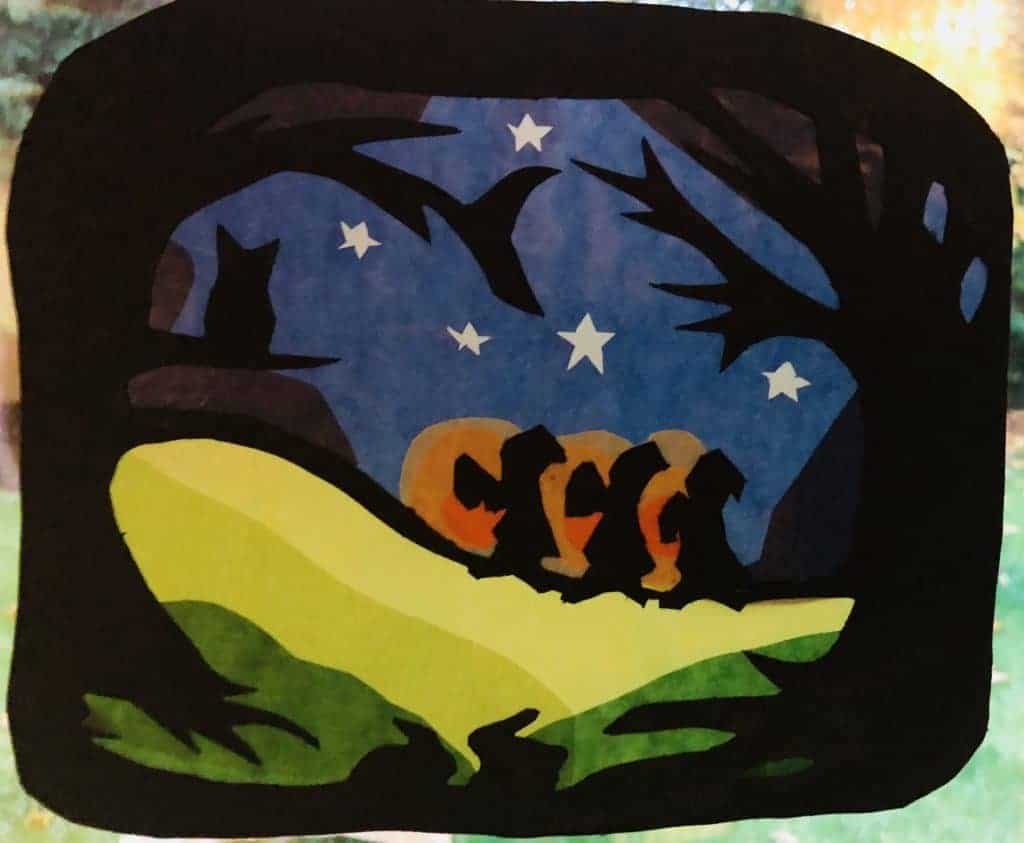
This is a great activity for older children. The one below is very detailed but there are simpler versions of window transparencies.
This transparency took me multiple hours and the printable pattern and directions can be found here.
Nature Crafts
If you are stuck indoors, bring some outside in and have fun creating some nature art.
Nature Art
Gather items from nature (if they are wet, let them dry first). Set out paper and glue and let your children create!
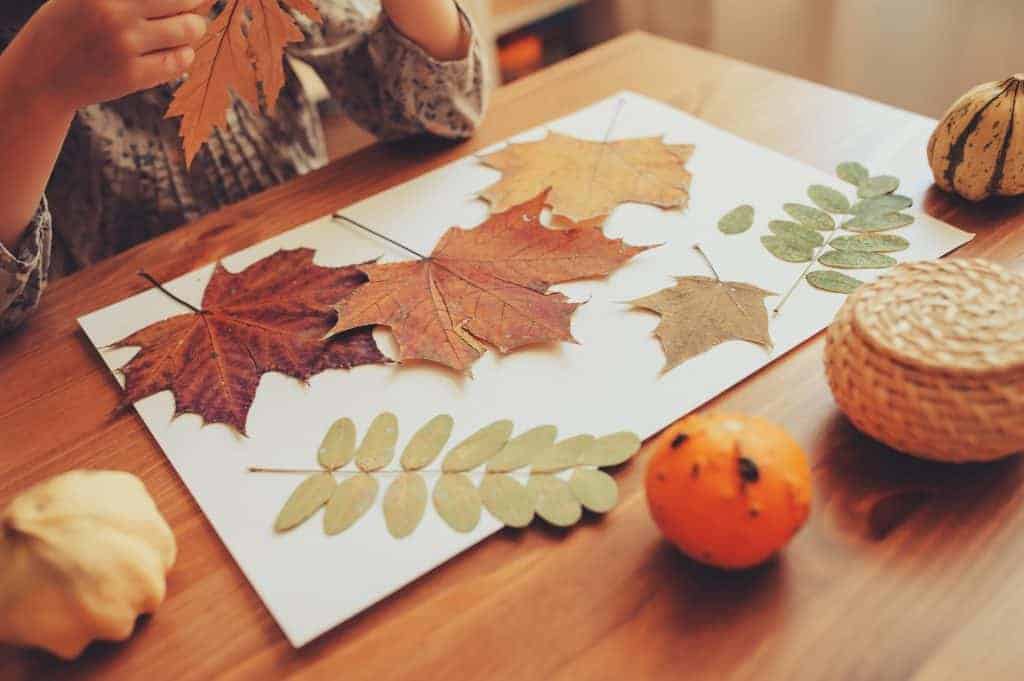
You can also help guide your children into making nature into animals and other decorations.
Pine Cone Crafts
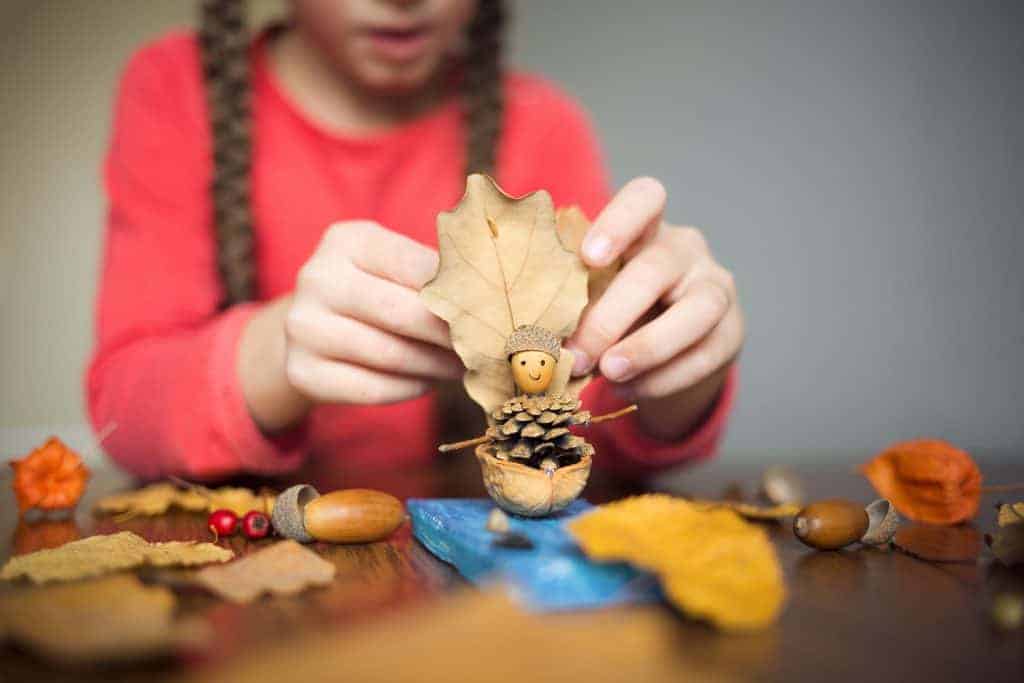
Using a pinecone, walnut shell, leaf and acorn as a hat you can get creative!
Nature Wands
Gather sticks and paint them (optional) and add nature items to create special nature wands for your children.
Stories & Audio Stories
Sparkle Stories
Sparkle Stories is hands-down our favorite audio-story. We love the Martin & Syliva stories as well as the Junkyard tales. I download the Sparkle Stories then play them for our children (for lower EMFs). There is also a monthly streaming option.
Entangled Harmony
Entangled Harmony is a subscription-based, downloadable monthly story booklet. Inside the monthly books are stories as well as craft ideas and nature ideas. You have a lifetime access to these 12 monthly booklets. We have enjoyed these very much over the years!
Twelve Little Tales
Twelve Little Tales has beautifully drawn watercolor pictures and lovely starter stories. Starter stories are ways to get your creativity going to tell more stories to your children (vs reading books). Twelve Little Tales has a digital option as well as a mail option for their starter stories, drawings and prompt cards.
This isn’t a direct option for children but rather to help you as the parent get creative with storytelling. The drawings are beautiful and your children will definitely enjoy those as well as having some new stories told by their parents.
One-Third Stories
One-Third Stories is a subscription-based foreign language program that includes books, activities and an audio story. One-Third Stories are 1/3 in the foreign language and 2/3 in English. The age range is 4-9.
This is a great introductory way to bring a foreign language to your children.
Play
Build a Fort
Get out some pillows, blankets, sheets, and wooden play clips and the possibilities are endless!
Unstructured, independent free play!
Let your children self create and self motivate. Let boredom breed creativity! The gift of boredom is underrated. In our fast-paced world, it’s ever so important to let our children have time to just be.
Sometimes independent play is hard for kids, especially those that haven’t had to do it before. Slowly over time, they can build up to being able to play independently. This is not saying don’t ever play with your children. Just give them the space of not being constantly entertained. The creativity that unfolds is inspiring!
In the Kitchen with Kids
There are so many great things to do in the kitchen with kids. I hope you feel inspired by some of these suggestions.
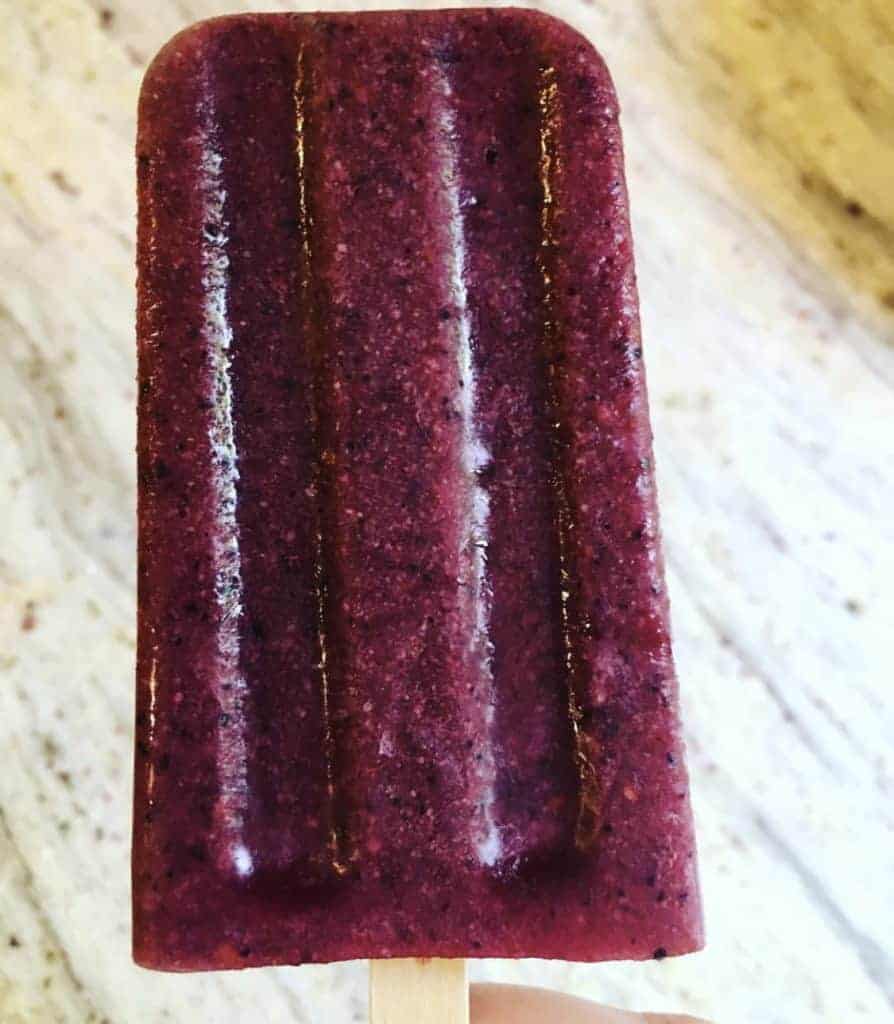
Smoothie Popsicles
This is the world’s easiest popsicle. We make smoothies often and I put the leftovers into our popsicle molds for a healthy, easy treat.
We use the Onyx Stainless Steel molds and wooden popsicle sticks (made in the USA).
Our smoothies vary daily but we generally do some combination of (all organic ingredients): banana, frozen fruit (strawberry, blueberry, cherry, raspberries), avocado, greens, coconut oil, hemp hearts, chia seeds, nuts or nut butters.
Watermelon Popsicles
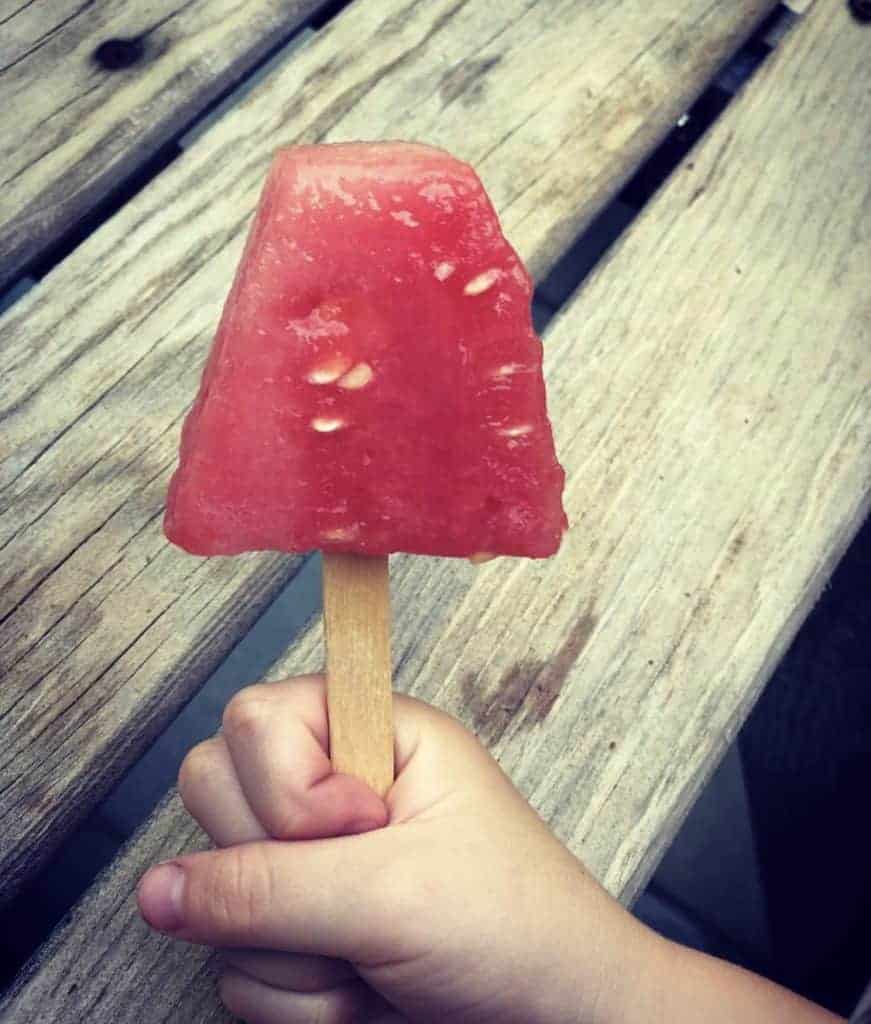
Frozen watermelon popsicles are SO easy and so fun for kids.
You slice the watermelon in about 1 inch thick slices. You can have your kids press cookie cutters into them to make them cute shapes. I just cut them. This is also a great time to have your children help in the kitchen and cut the shapes. Once you are done cutting, you stick a popsicle stick in the bottom and pop them in the freezer for a few hours. It’s as easy as that!
Poetry Tea Time
Make some tea, a few snacks and read poetry while you enjoy some downtime at the table. Once we are all settled, I’ll read poetry out of some of our favorite books. My sister-in-law got me onto this and I really love it.
Our favorite poetry books are: A Family of Poems: My Favorite Poetry for Children, The Waldorf Book of Poetry: Discover the Power of Imagination and Eric Carle’s Animals Animals.
For tea, it’s really important to use organic. Even then you also need to be careful about the plastic and other toxins in the bags. I mostly use Traditional Medicinals (they are truly toxin and plastic-free). Our favorite is chamomile and it is a great kid-friendly choice. I also keep peppermint on hand, and I personally like their detox tea (not suitable for children).
For the snacks (organic) we keep it simple with almond butter sandwiches cut up into smaller sizes, some fruit, and nuts.
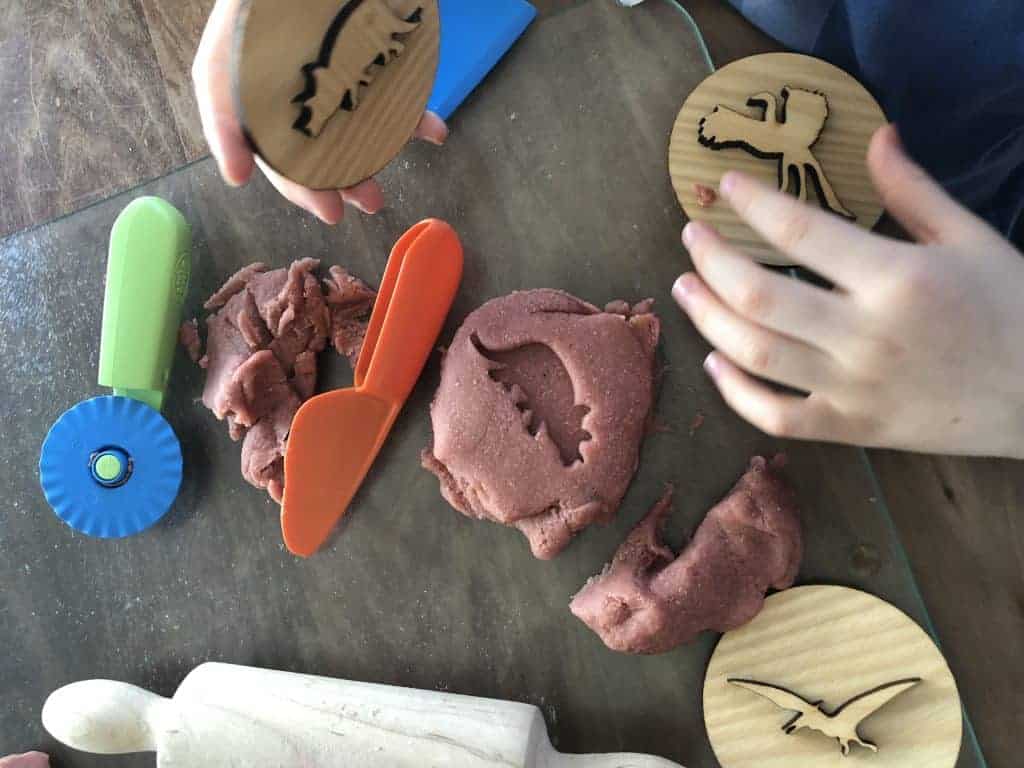
DIY Playdough
Making your own natural playdough is so easy (and it’s cheaper than buying!). My DIY Natural Playdough post will give you the recipe I use, how I dye our playdough naturally, and the non-toxic playdough toys we use.
Oobleck
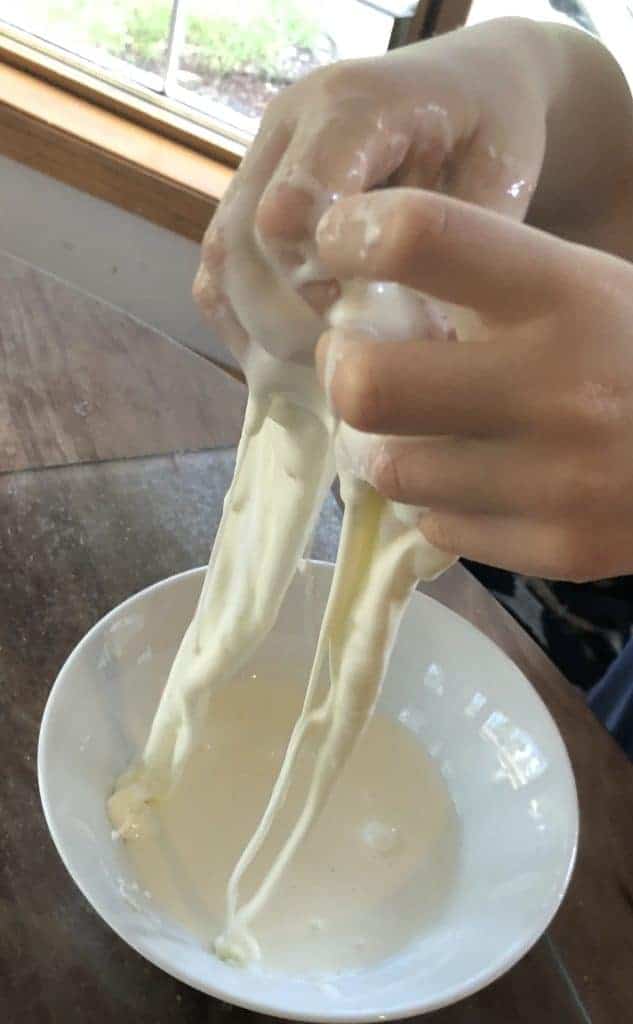
Oobleck is not a solid and not a liquid but oh so much fun!
If you want a mess-free project this is not for you! Expect a mess that is relatively easy to wipe up with a damp towel.
How to Make Oobleck:
Mix 2 parts corn starch (I use organic corn starch) and 1 part water.
If it’s too thick add more water, if too thin add more corn starch.
When it’s ready have your child poke their finger quickly onto the top of the Oobleck. It should resist their finger.
Then have them slowly put their finger in, and it should go right in. Then let them have fun and explore!
If you let it sit out it will go back to corn starch consistency after a few days. You can add water back to it to use it again.
Homemade Bird Feeders
There are many great options for making bird feeders. This post gives 3 different ways to make bird feeders.
Cooking in the Kitchen Together!
Take advantage of being inside to teach children life skills like cooking. Baking, soup making, helping with dinner.
Safe, Non-Toxic Kitchen Utensils for Kids:
We love this safe, stainless steel crinkle cutter to make yam fries or cut veggies.
This is the stainless steel knife I have for my children in the kitchen.
Organize & Declutter (this can be rewarding!)
Helping organize their space and working through how to decide what to keep, donate and throw away. When your home is orderly, it gives the sense all is well (children can both see it and physically feel it). A decluttered and simple home speaks to children deeply and helps children feel secure.
Fewer toys, fewer books, fewer clothes!
If you aren’t ready to purge toys then declutter what you can then move to a toy rotation. The “fewer the toys, the better children play together” according to Simplicity Parenting (one of my favorite parenting books).
Keep toys that are simple and open-ended. Things that have many uses like cloths/silks, things to build and create. Open-ended toys lead to creativity, and creativity is connected in the brain to cooperation (according to Simplicity Parenting).
Less toys = more creativity = better cooperation among children.
Use your time home to declutter, this is something for your inner well-being too (not just for your children)!
I hope you have found this list helpful and you are inspired to tackle some new, and fun, indoor adventures with your children! I would love to hear how you like them!
Pin it for later!


I love this site and reference it often! Thank you so much for what you do!
Can you comment on or make a post on eco friendly sensory toys/play?
I’d love a ball pit for our sensory kiddo and also would love to make glitter jars but not sure where to start really.
(We do sensory bins with rice, beans, pinecones, etc and homemade play dough which we love! but would also love more ideas 🙂
Thank You!!